Belkin MagSafe monitor mount, Continuity Camera, and using your iPhone as your webcam

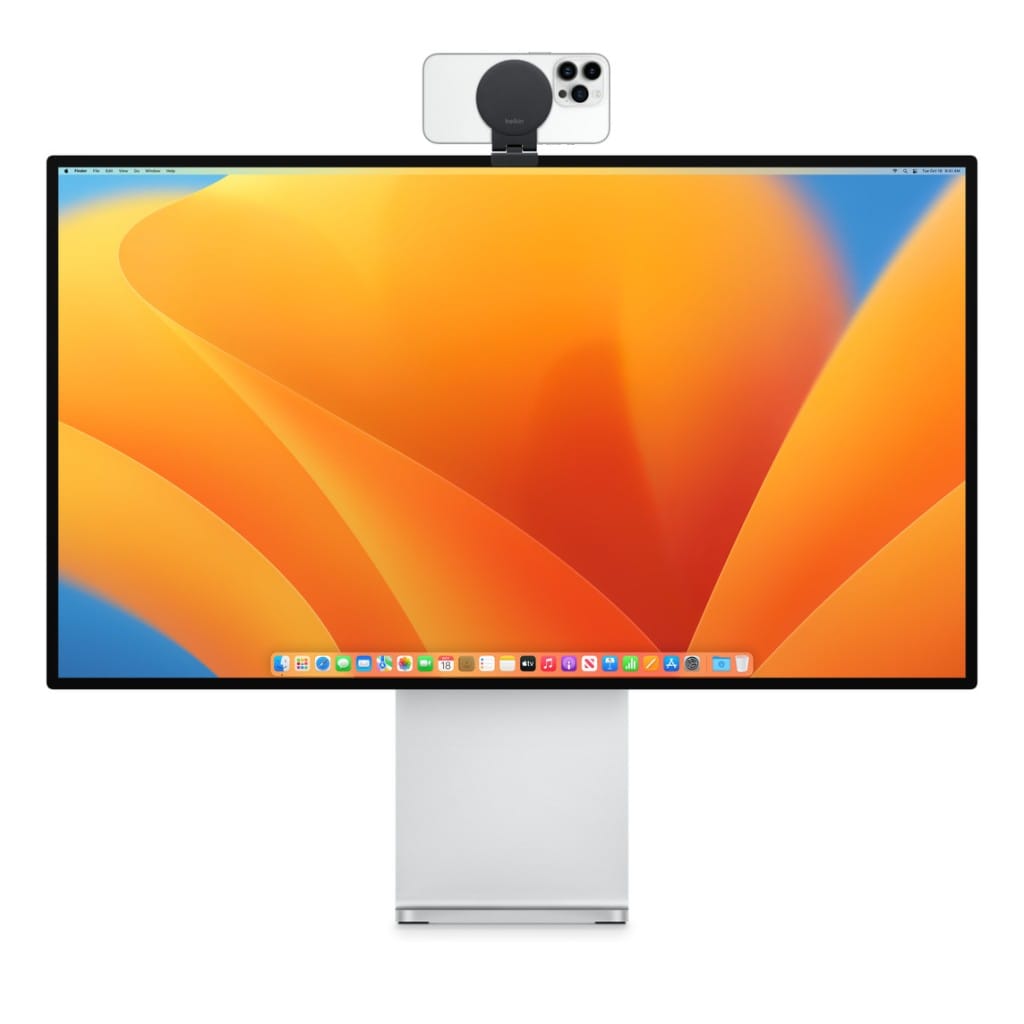
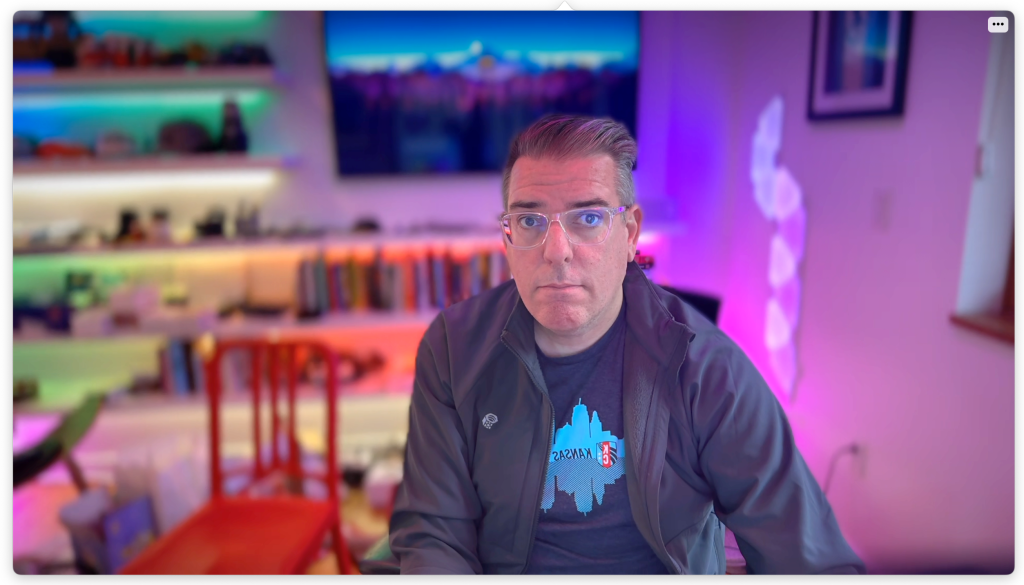
Last month I heard that Belkin was releasing MagSafe iPhone mounts for the MacBook and another version for Studio Displays (or any other monitor really). I bought the monitor-focused one and it showed up today. It's pretty great! Here's the best settings I could get with Center Stage and Portrait Mode and Studio light turned on.

This is pretty friggin' good for a phone camera talking wirelessly to your Mac.
I've played with desktop webcams for the past 5+ years, using things like a Canon 5DMk3 with a nice f/1.8 lens. A couple years back I settled on using an older Sony A7II with the default lens, which gave almost as good of quality as the Canon with about half the size and a better auto-focus. I've played with phone apps like Camo in the past, but it was never quite as good as a dedicated camera.
In the last MacOS release they added "continuity camera" as a feature to turn your iPhone into a webcam any time you need it. There are two cool things about this over something like Camo, which is it's all automatic and wireless, and MagSafe makes it dead simple to just plop your phone onto the magnet above your monitor.
It took me about 30min of tinkering with settings to find the best possible picture from the setup. Here are my suggestions.
How to get the best possible settings for your iPhone Continuity Camera
Step 1: Toss your Belkin MagSafe adapter on top of your monitor
Step 2: Attach your phone to it with the rear-facing camera looking at you, it has to be locked too (no need to unlock nor do you need to launch the camera app)
Step 3: Launch any Mac app that uses your camera, go to that app's video settings and select your iPhone as your camera source, then wait 5-10sec for it to show up in your app as your camera (there is a bit of a delay where it seems like it's not working then BAM! it works)

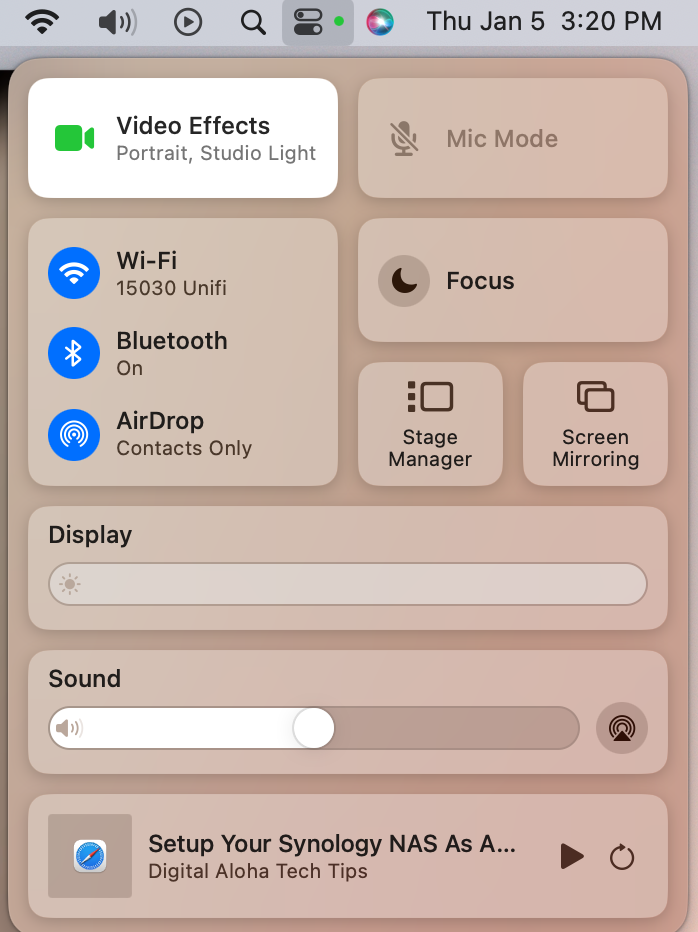
Step 4: Click the little switches in your menu bar and you will see Video Effects as an option to control the camera through MacOS

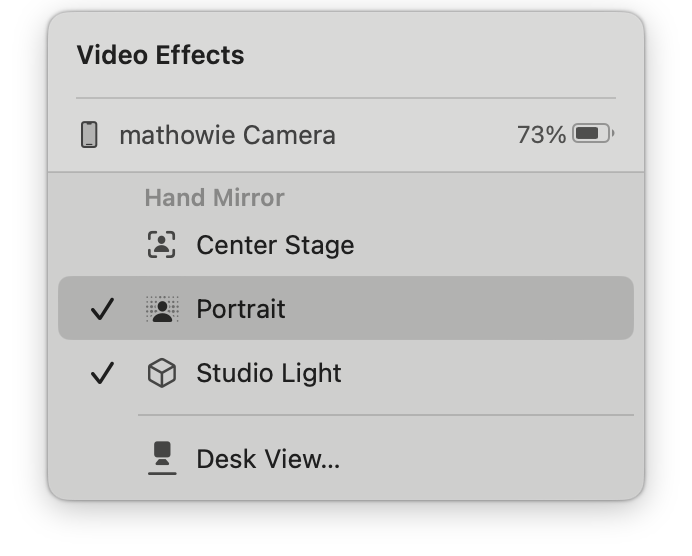
Step 5: Try out all three available options. I like the look of Portrait mode turned on. Try out the Studio Light option too, and Center Stage will zoom in on just your head if the wide angle is too much.
That's it! Go back to Zoom or Skype or Slack or whatever and use your phone as your webcam. It's pretty great. I also love that you can see your phone's charge on the Video Effects panel and it'll warn you to connect your phone to a charger when it gets low during a call.
Oh, one last bonus feature: there's a tripod mount on the bottom of the Belkin mount, in case you want to use a tripod instead of the top of your monitor, which works great on any standard tripod.
Update: two months later
I still love this mount and use it all the time for video meetings, but I did want to add that since I first started testing it, the wireless camera connection has been pretty flaky, to the point that I don't use it anymore and just wired up a lightning cable to my monitor so I can connect with a cable, which makes the camera available almost immediately.
Subscribe to get new posts in your inbox


