Building DIY LED strips for fun

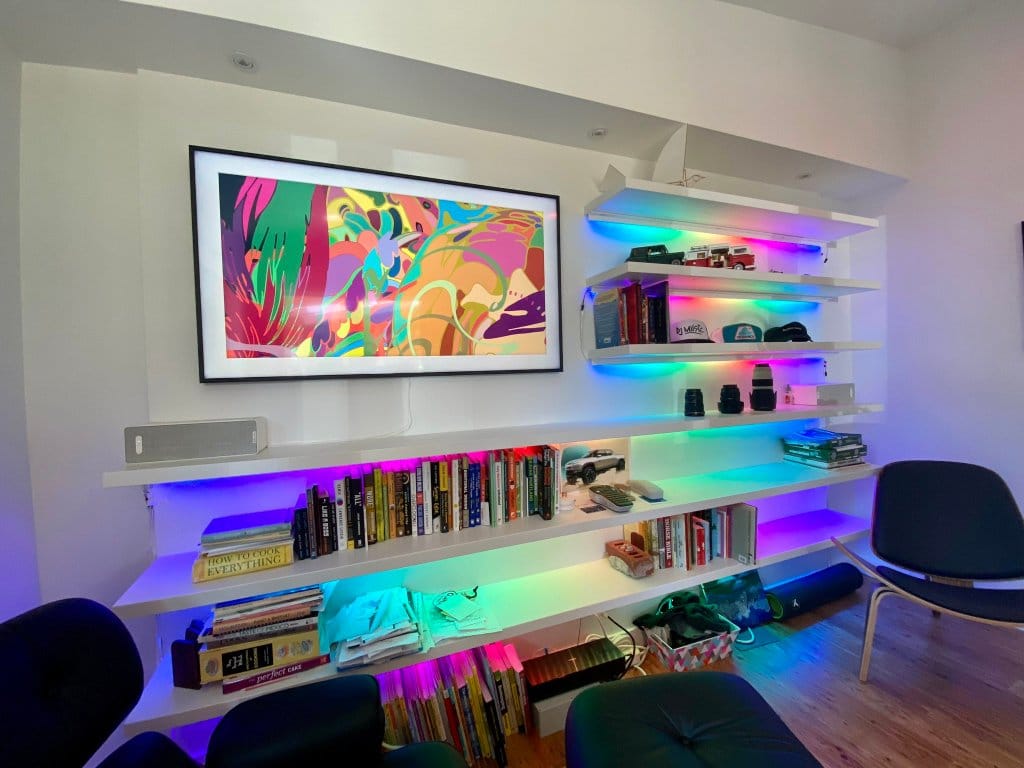
I work remotely and have for many years, but let's be honest: it's the case for a lot of people now. Lately I've been trying to step up how my home office looks, especially with regards to its video conferencing capabilities. I started using a DSLR as my webcam along with a ring light and dimmable room lights. With the basics out of the way, I next wanted to work on my office's background by installing LED light strips below each my office's bookshelves.


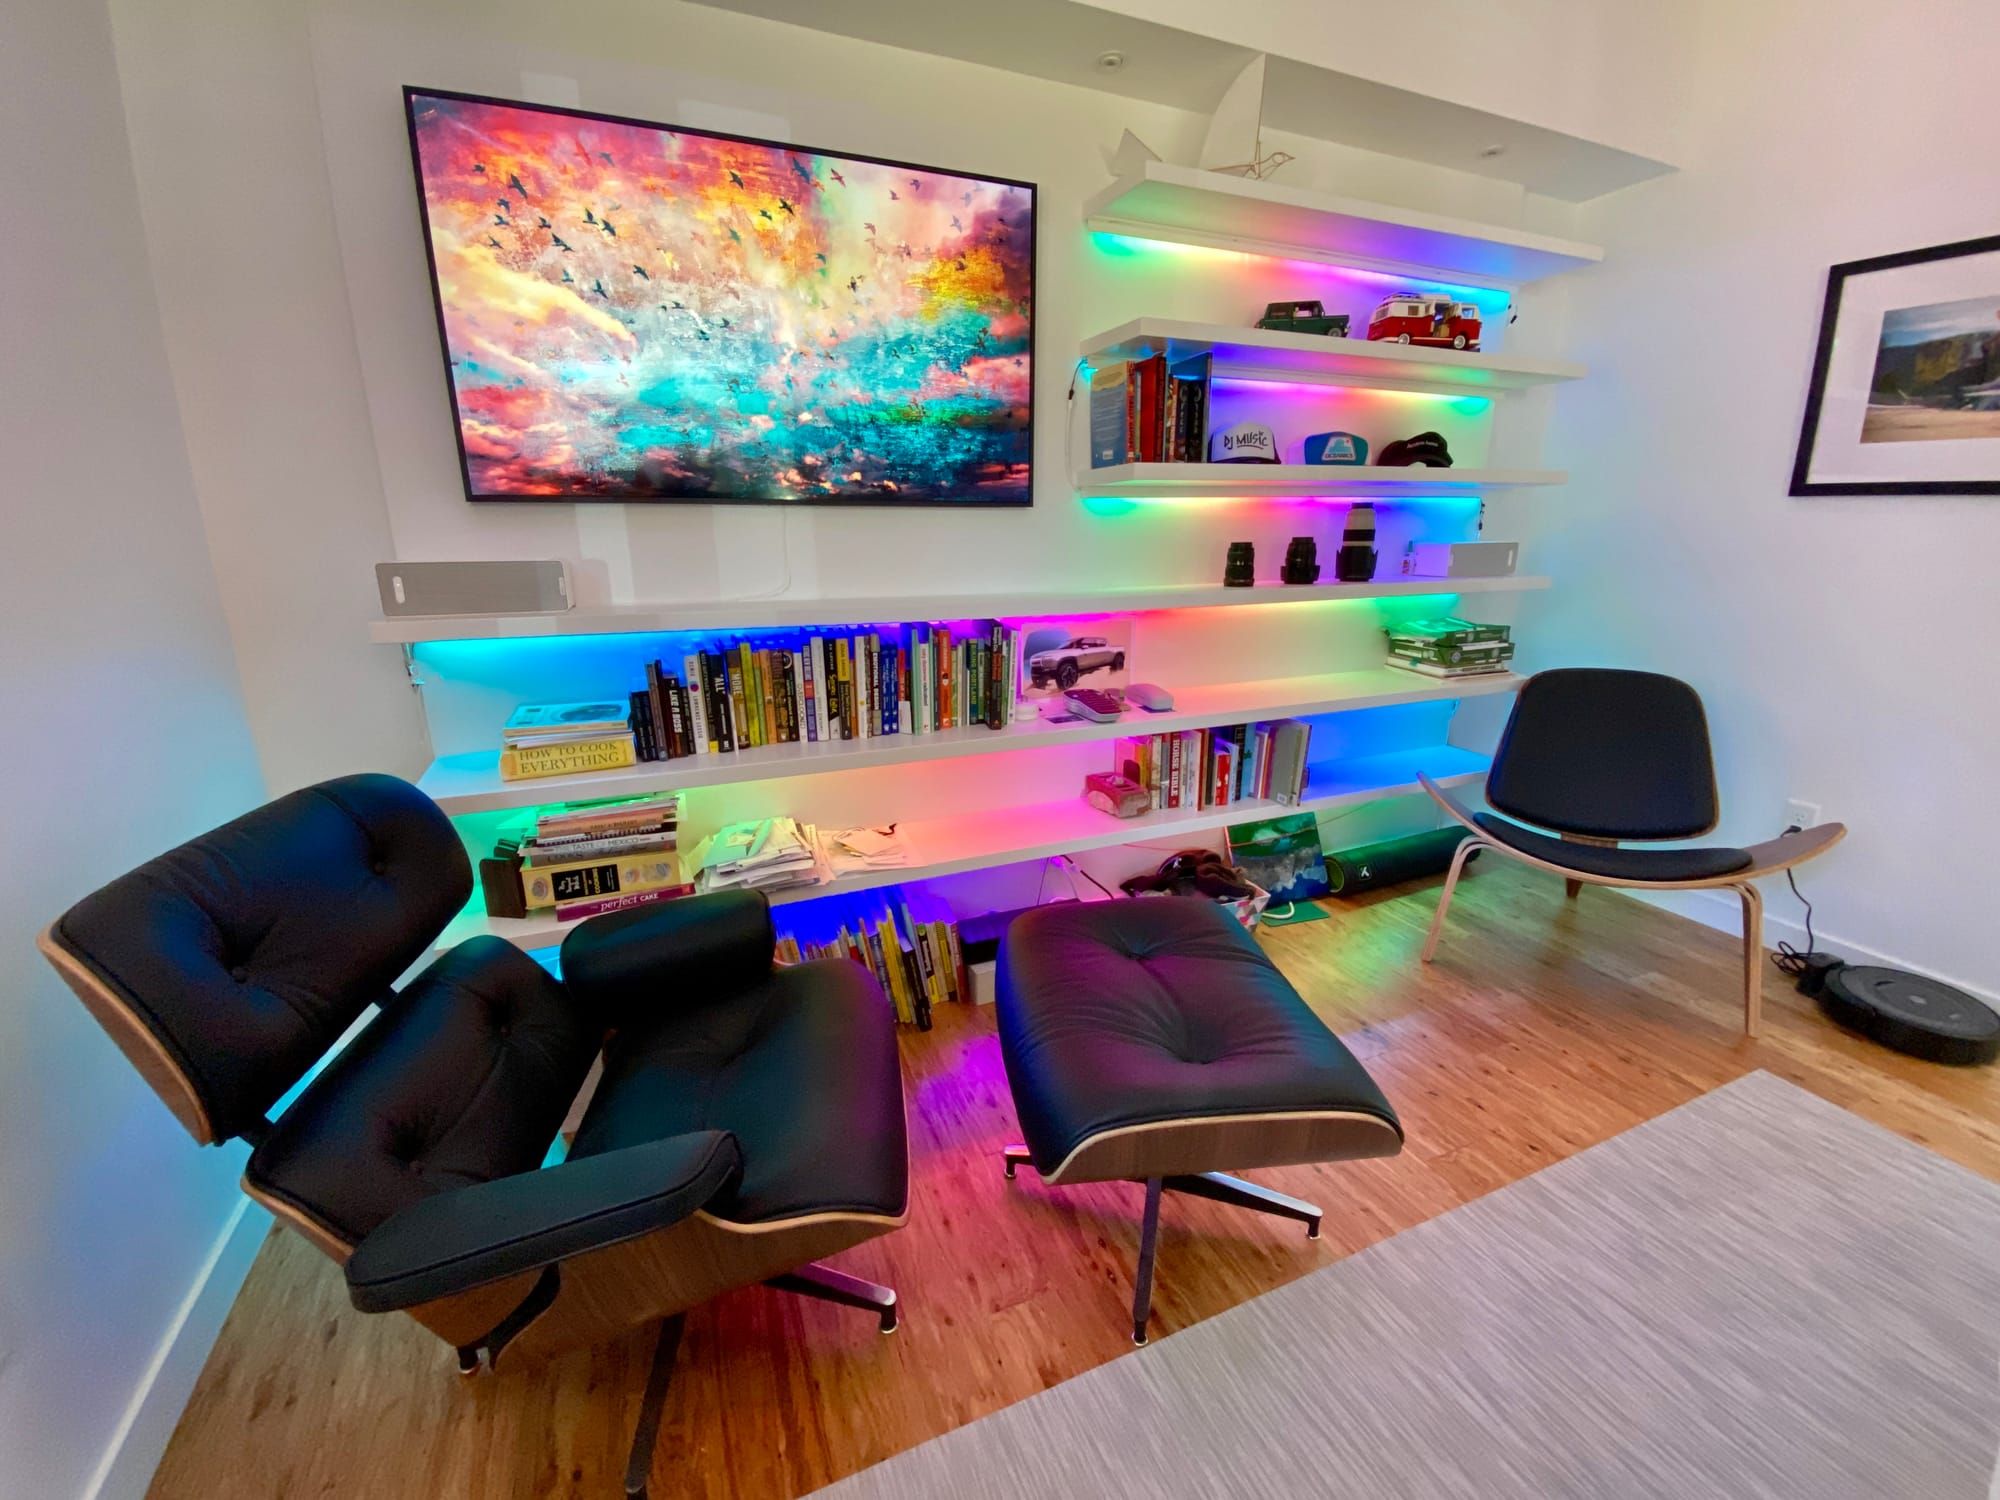
If you've watched YouTube or Twitch streamers, you might have noticed they have interesting backgrounds behind them, often with colored LED lighting on shelves or in corners. My new home office has a bunch of built-in floating shelves and I thought it'd be a perfect place to install LED strips.
LEDs are ample, ubiquitous, and cheap
LEDs are amazing. They're incredibly bright while also using low power. Modern technology has incorporated them into almost everything and that's driven the price for light strips ridiculously low. What you see in my final product in the photo above cost about $100 total for 45 feet (15m) of light, including a hard-wired controller, all the wiring, and the power supply.
BIG NOTE UP FRONT: You can buy great pre-built, consumer grade LED light strips that come with a remote control, can be controlled by your phone, and are relatively cheap. Personally, I've purchased a few Govee light strips like this long one and they work great for simple applications like on a shelf, or around a door jam, or up on a crown molding. For 90% of most people's needs, that's the best and easiest way to go.
Since I had six shelves, I didn't want to have to manage six plugs, so what I'm describing here is going the full-on DIY route, cutting your LED strips up, using a solder gun, and creating the exact lights you need for your space. Here's how I did mine.
Buy some WS2812B strips
This video is a fantastic overview of all the options when it comes to LED strips, but the long-story-short is WS2812B is the standard designation for a simple, individually addressable string of LED lights. I bought mine with no waterproofing (since they're used indoors) and I got them in 30 pixels/meter density to keep my power needs low. Typically you'd pay about $10 for a 6 foot (2m) string and 16 foot (5m) strings are about $20. They're all over eBay, Amazon, and Aliexpress (which is the cheapest but can take the longest to arrive).
Light strips come with a simple adhesive sticky backing to mount under things, but I went a little extra and bought some aluminum channel designed for LEDs that also comes with a diffuser panel that helps spread out the light. You screw them into something, stick your LED strips inside, then snap on the outside light diffuser for a more permanent installation.
I also finished off my mounting by putting this corner guard in front of the lights to both hide the aluminum strip and further diffuse the light on the upper three shelves. It gives a nice downward glow.
Next, buy and prepare your controller
Your lights will be controlled by a tiny computer chip with a WiFi adapter in it and the one you want is a NodeMCU ESP8266. The great part is they're only about three or four bucks each and I bought this set of three at Amazon just in case I fried one along the way. Download WLED software and flash it to your NodeMCU, then configure it onto your WiFi network. All of it is covered in this step-by-step video to building your first light strip. If you buy the things you need, just follow Dr Zz's guide closely to get them all working (it's how I did mine).
Wire it together with a power supply
The above video also goes into the math around how to select a power supply for your LEDs. You'll also have to pay attention to the voltage in your system. I went with 5V LED strips for all the reasons stated above (lower power needs, cheaper strips), but make sure you use 5V everything, including your power supply, your NodeMCU, and all your wired connections.
My strips all together total 400 LEDs so I needed a pretty big power supply. I bought this 30 amp model that is fanless and runs cool. My first purchase was a 60 amp power supply with a giant fan but it sounded like a hair dryer when you plugged it in and I'd only suggest using those for outdoor applications.
I used basic red/black wire for dropping power on each strip's end. I used some LED wire to connect them all together back to the controller. I avoided a lot of soldering by using these specially made connectors that fit my LED strips perfectly. I also used these T-connectors for connecting additional power while reducing the amount of soldering needed. A set of jumper wires is needed to quickly connect up your NodeMCU to your power supply.
Fire up your phone and enjoy your lights
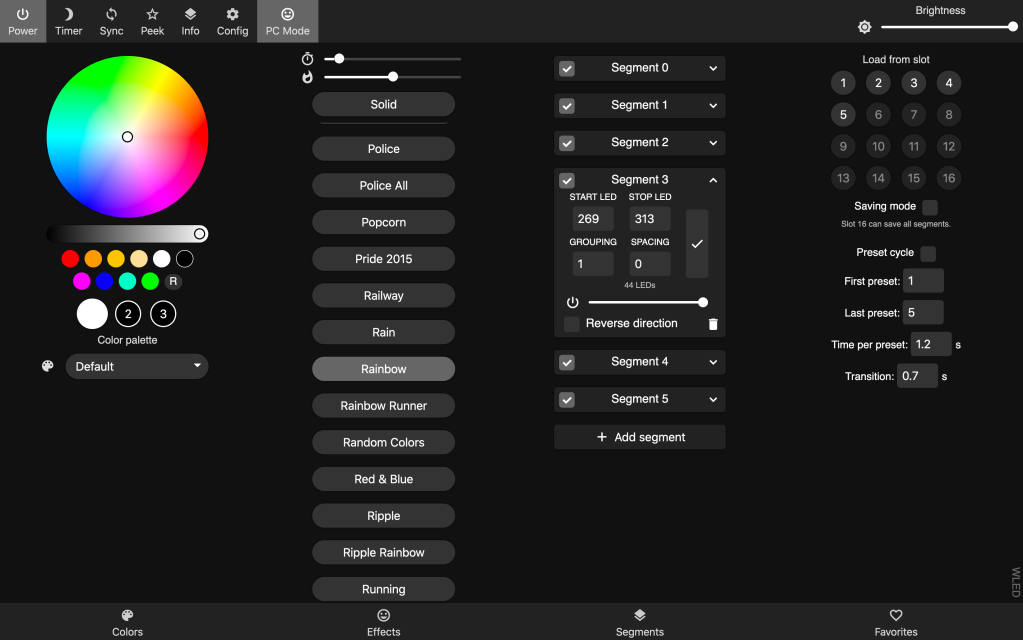
Download and install the WLED app for your phone and you should be able to control your lights after some configuration (don't forget to input the exact number of LEDs you have and play with your LED preferences). You can also control them from a desktop web browser by simply going to your controller's internal IP address.
WLED is pretty incredible since it comes with a couple hundred different patterns already built-in and you simply select them to make your lights run complex patterns. I've customized my setup to split each bookshelf's strip into its own segment, so programmed light effects happen on every shelf at once.
I've also added my light strips to my Homekit control by using a WLED homebridge plugin so I can turn them off or on from my phone inside or outside my house, and as part of routines. Currently, I'm working on an iOS Shortcut to automatically dim my room's Hue lights and turn on the LED strips whenever I connect my AirPods to my laptop (which is when I'm about to jump into a Zoom meeting).
To complete the look for my office, I added a Samsung Frame 55" TV I flush wall mounted that I turn on each morning to display Samsung's art prints, which I rotate out often. The Frame TV is pretty incredible, with a screen that has a matte finish and it really does look like a painting to the naked eye, though when photographing it, it tends to overstate the brightness making it look more like a bright TV. If I had one TV in my living room over a fireplace mantel, I'd totally buy one of these, since it looks great when you're not watching TV.
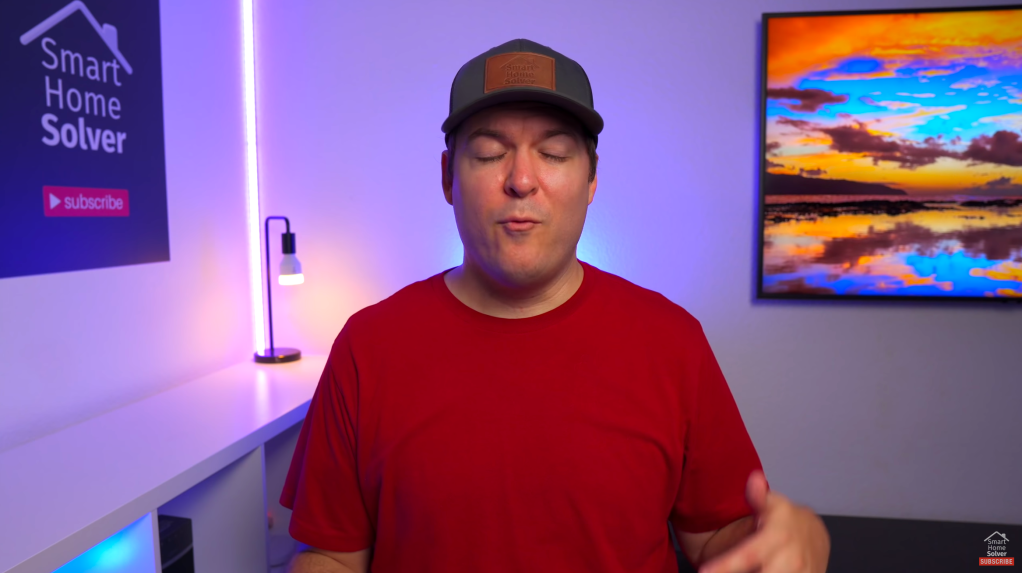
Here are a few more shots of what my LEDs look like installed, along with what I look like in a Zoom meeting (on a Saturday, wearing a tie-dye shirt).
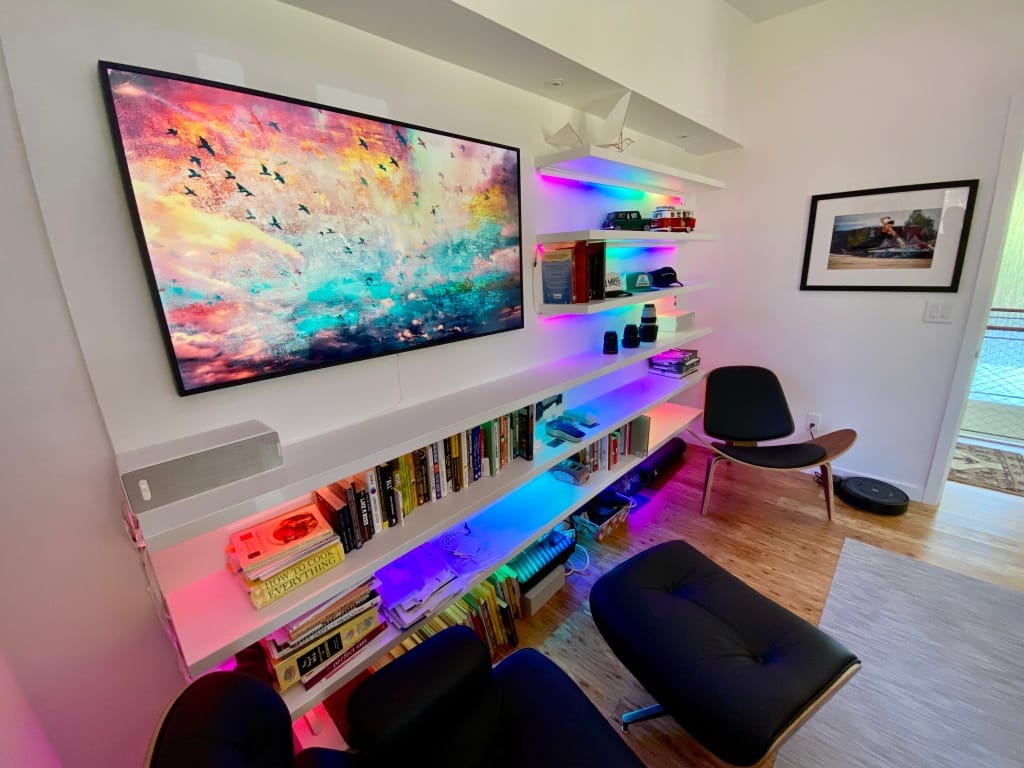
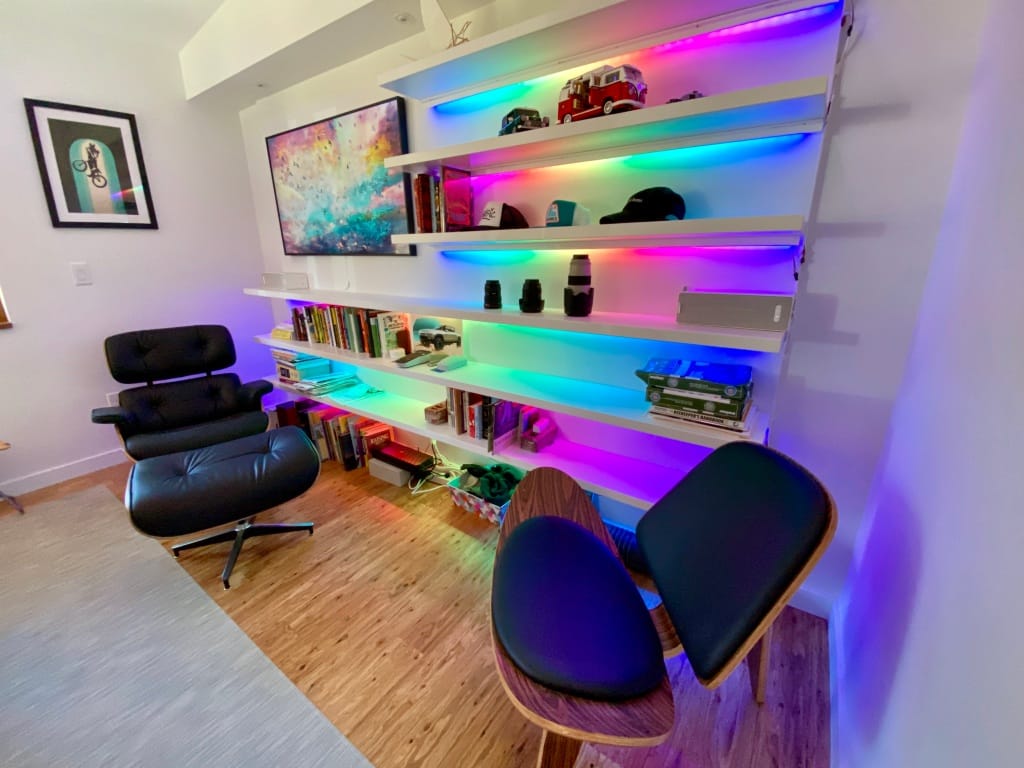

I've got the LEDs set to a rainbow routine that I've slowed down, and they gently change in the background of my meetings.
Again, if you have a simple setup, just go with an off-the-shelf option like the Govee lights, but if you want to go fully custom, LED strips are a fun cheap way to add some color to your surroundings.
(in case you were wondering, that's not a real Eames chair, it's a nice knock-off I bought on Aliexpress for $500 and the plywood/leather chair is another famous knock-off from Aliexpress for $150, they're mostly used for reading books in or giving guests a place to sit.)