✅ finished my LED strips for lighting stairs

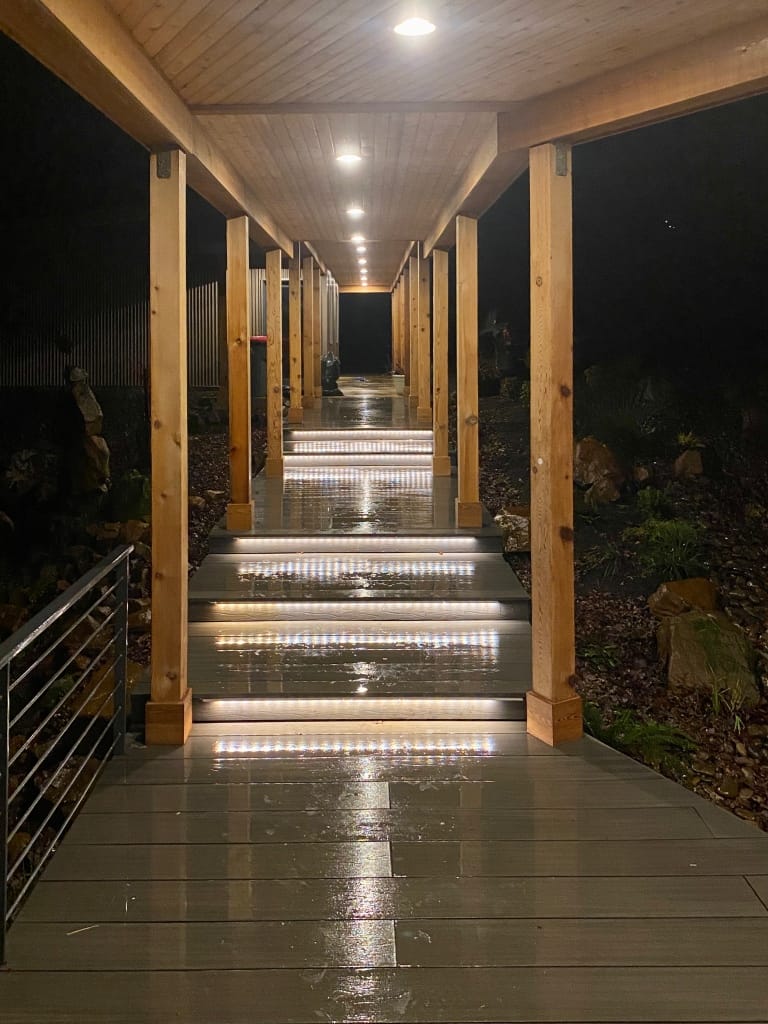
I've got a long walkway with five stairs going down it leading to my door and everything is a dull grey Trex-style decking that makes it hard to discern where the steps end, especially at night. I could have put a line of black grip tape on the end of each of the steps but I thought it'd look kinda ugly. Instead I wanted to tuck some LED light strips below the edges to put down a pool of light for a more subtle effect.
Here's the finished product from above a set of 2 long stairs and then 3 long stairs
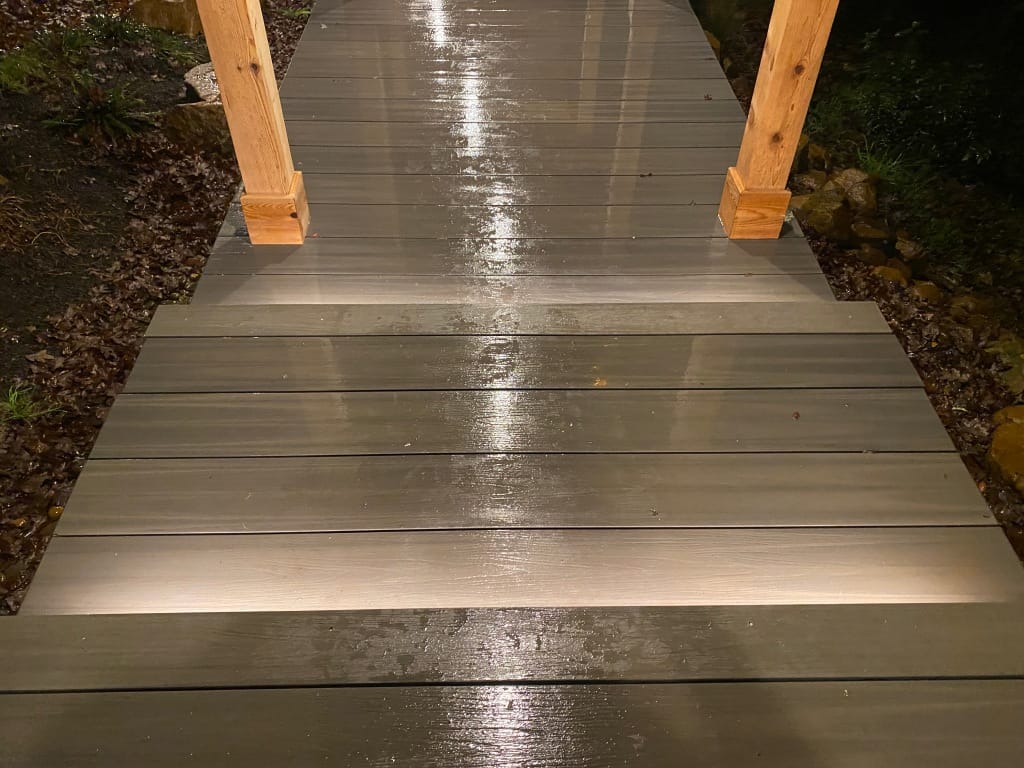
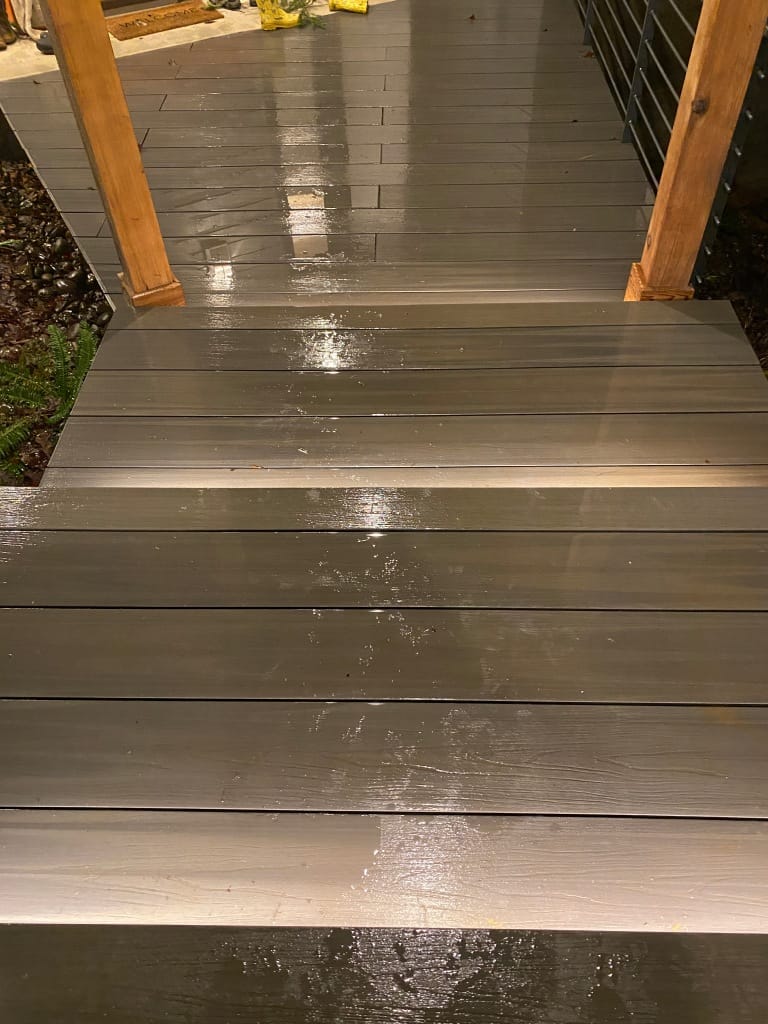
It came out pretty well, exactly what I was looking for. You can't see the lights from about ten feet away but as you get closer to them, the effect is more pronounced and gives you a hint of where to step down (before all the edges were lost in a sea of gray).
About the only problem is from below, they kinda look Las Vegas-y (especially when it rains and the deck gets wet from rain blowing sideways in a storm like we have now). I have some extra LED channel covers, I might take a scotch brite pad to them to rough them up and try to make them a bit more opaque so that the "dot effect" is diminished and they look more like soft bars of light. If all else fails I might try some diffusion films.
Here's everything I learned by doing this myself
A workbench at a comfortable height makes repetitive projects night and day easier and faster
My back was fucked up from doing the first step a couple nights ago, bent over on the ground while I was on my knees trying to cut materials and drill things and get it right and it took me about 3 hours to finish just the first step and I had four more to go.
The next night, I brought them all into the barn where there's a gigantic workbench at standing-desk height, and I also went out and bought and installed a bench vise on it. Using the bench it only took me 45min to cut four LED channels, drill all the pilot holes, screw in 20 LED channel mounts, and cut the clear covers for them.
Everything at a proper height and having a workspace to batch operations made it super easy and my back isn't killing me now that I'm done.
Doing this over multiple days was a godsend
I've been thinking about this project for three months, and seriously working on it for a couple weeks, making small pilot test strips and buying supplies to make slow and steady progress on it. Even doing the installation over a few days helped because every night I would wake up with a solution to a problem that stymied me the day before. It kept happening throughout this project where I'd hit a wall and hang it up for the night and wake up with a better working solution. It's really amazing what a good night's sleep will do for your problem solving.
Simpler is always easier
I had grand plans to do a bunch of custom soldering and programming and such to get cheap generic waterproof LED lights to work but in the end I went with off-the-shelf Philips Hue LED strips with long extension cords because they were A) super bright at 1600 lumens per strip and B) super easy to wire up and use the Hue app to program them to come on every night at sunset and go off around bedtime.
There's a tool for everything
Any time I wondered "how am I going to get this screw into a spot around that corner where I can't fit my drill?" I'd wander into my local Lowes and talk to the people in the hardware section and find out oh wow, they have a tool for exactly what I need.
Parts list
- 5 Philips Hue light strips (pricey but found a few on sale for $49 each. I had tried 30 LED/meter 5V waterproof lighting which wasn't bright enough and I was worried 60 LED/meter 5V strips would be more difficult to wire and deliver enough power to)
- A 10-pack of LED channels made for wider Philips Hue strips (it's hard to find larger LED aluminum channels that fit the Hue strips and still fit under the edges of my stairs and these were perfect)
- 2 amazon basics 15' outdoor extension cords
- 3 amazon basics 25' outdoor extension cords
- 1 SOCKiTBOX for waterproof outdoor electrical connections
- 1 outdoor surge protector inside the box with a long cord wired to an outdoor GFCI outlet on the side of the house